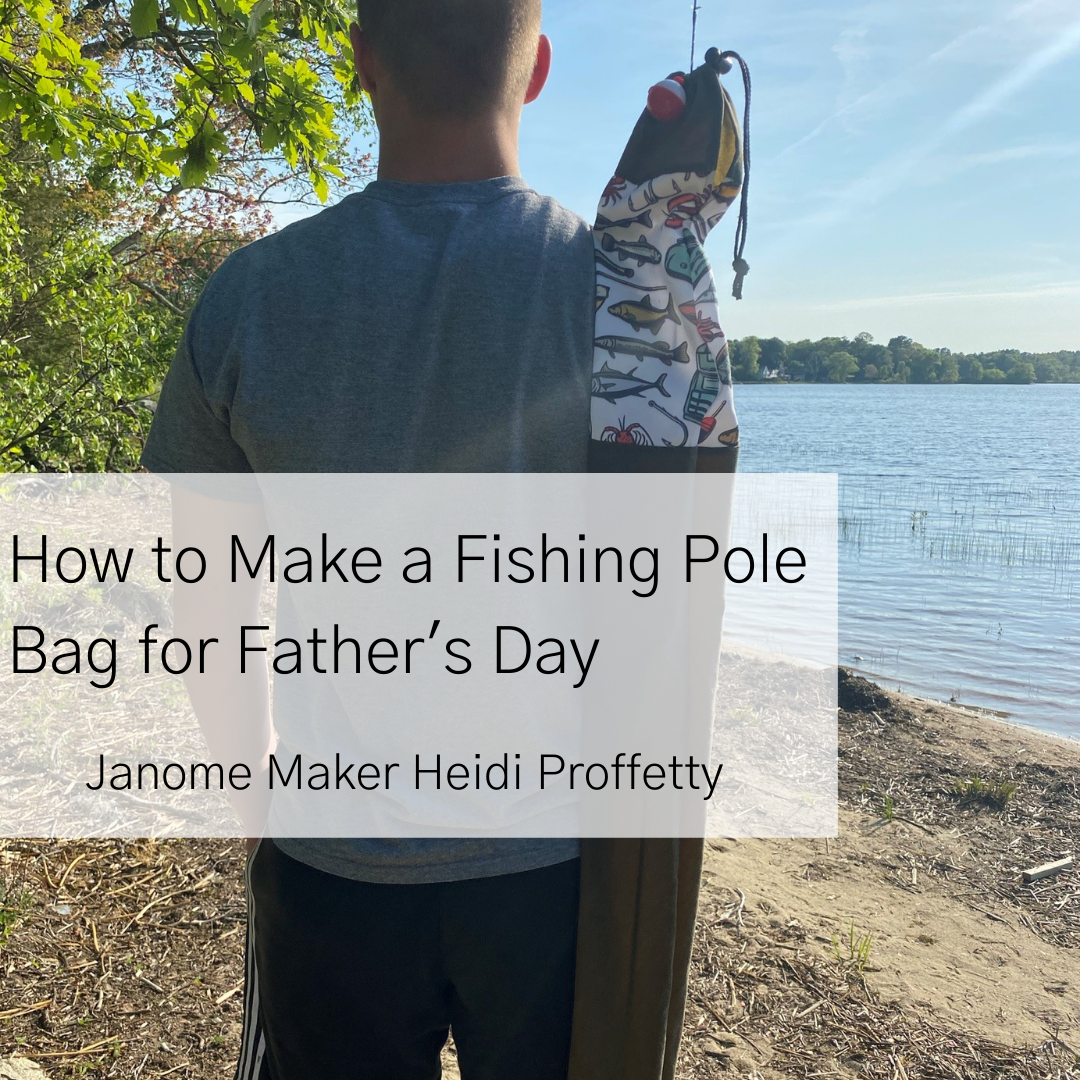
Father's Day comes at a great time of year for the dad that enjoys fishing and a summer fishing trip with a new fishing pole-carrying bag makes a perfect and relaxing afternoon.
Janome Maker Heidi Proffetty has just what the Fishing Dad in your life will treasure! A free tutorial for a fishing pole bag using her Janome Continental M7! Not only does the carrying bag sew up in a jiffy, but the fabric is also made from is waxed canvas which is both durable and water-resistant. You can also customize this bag. Make alterations to the overall length to fit Dad’s specific fishing pole length and change the bag’s accent panel to give it that extra special touch. Give him something he will love using the rest of this summer and beyond.
Skill Level: Beginner
Makes: 1 Fishing Pole Bag
Dimensions: 48” Length x 10” Width
Time: 1 ½ hours
Before You Begin:
Measure the fishing pole’s length and width around the reel (if the reel is attached). This will determine your specific dimensions and the amount of fabric that you will need for this project. This project is suited for a lightweight, freshwater, 4.6” to 5” fishing pole with an approximate 10” diameter (attached) reel.
Project Supplies:
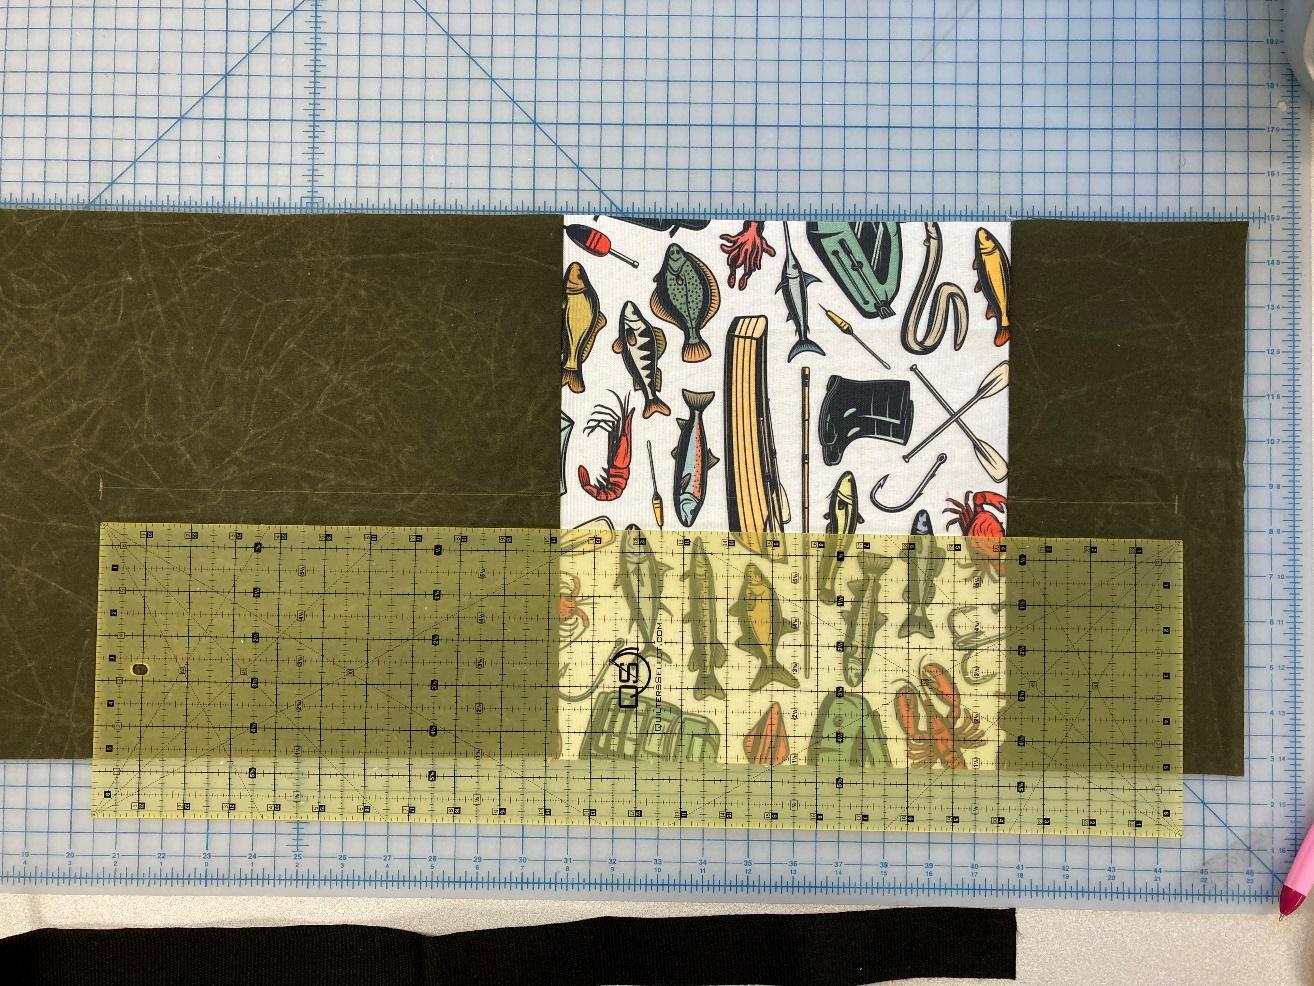
1 ½ yards of waxed cotton canvas fabric, Color: Moss
½ yard novelty upholstery or canvas fabric, Pattern: Fishing
24” x 1 ½” webbing or belt strapping
20” piece of cording and a cord stop
2 – 2” x 3” twill patches
General color matching sewing thread for construction
Scissors
Fabric marking chalk pen (light colored)
Cutting mat, rotary cutter & ruler
Mini clips (not pins)
Compass
Glue Stick
Janome Continental M7, Overcasting M foot & HP foot & plate
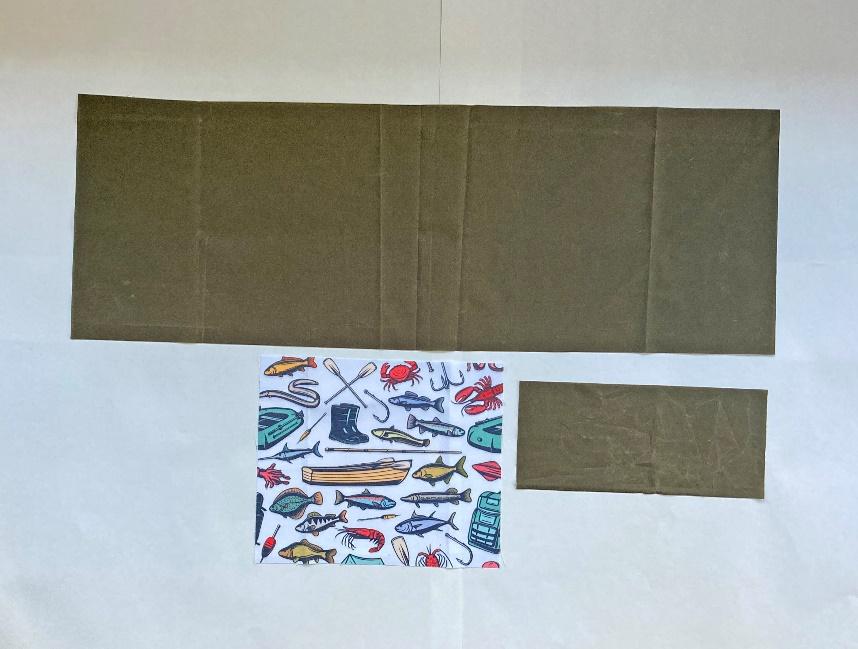
Part 1 – Cut Fabric
Use your rotary cutter, cutting mat, and ruler.
-
Cut 1 – 35 ½” x 12 ½” piece of waxed fabric
-
Cut 1 – 5 ½” x 12 ½” piece of waxed fabric
-
Cut 1 – 10 ½” x 12 ½” piece of novelty fishing fabric
Part 2 – Sewing Instructions
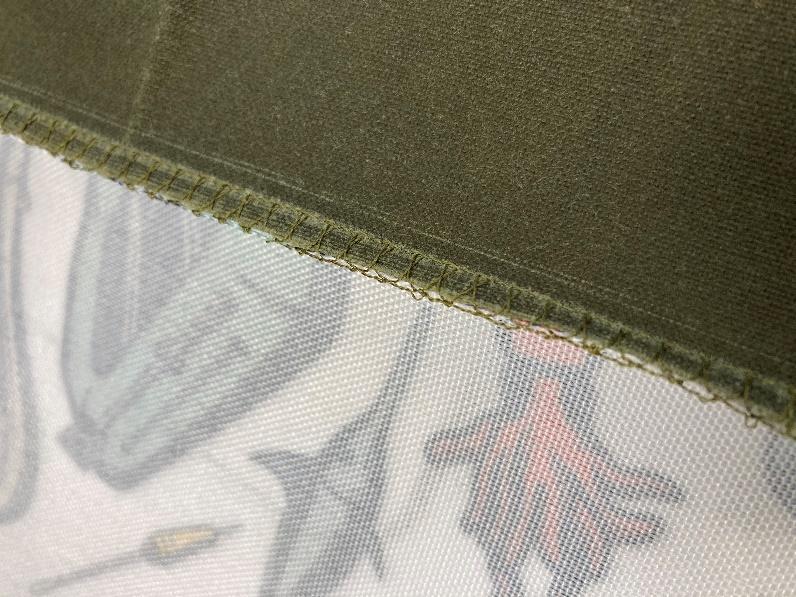
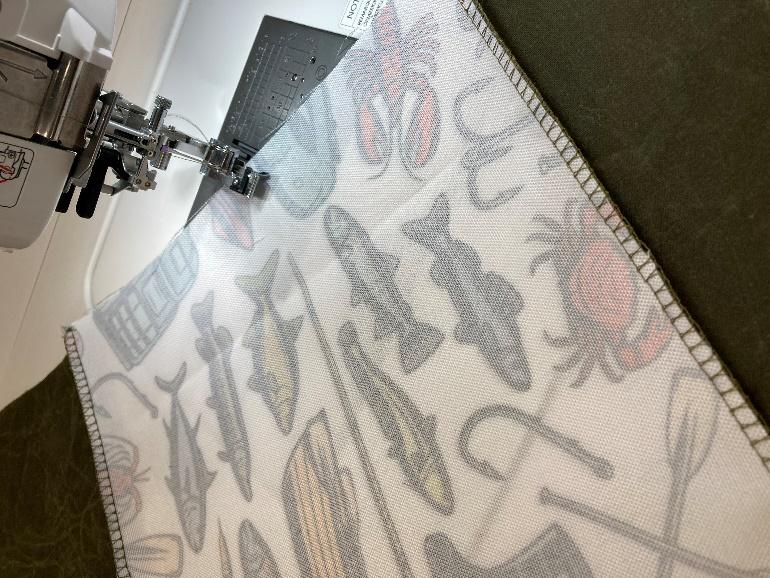
Set your sewing machine up with the Overcasting M Foot (or serger). Use mini clips to hold the right sides of the fabric together at each end. Position the novelty fabric so that the fabric is facing in the upright direction (not upside down) to the top section of the bag.

On the outside of the bag, using the fabric marking chalk pen, mark a center indications at 1 ½”, 6 ½”, and 24” down from the top edge of the bag. Next, draw a vertical centering line from 1 ½” mark to the 24” mark.
The 6 ½” mark will be the guideline for the top edge of the shoulder strap and the 24” mark will be the guideline for the bottom edge of the shoulder strap.

On the wrong side of bag, use a glue stick to temporarily secure a twill patches to both ends where the strap will be sewn . The patches provide extra support for any tugging on the shoulder strap.
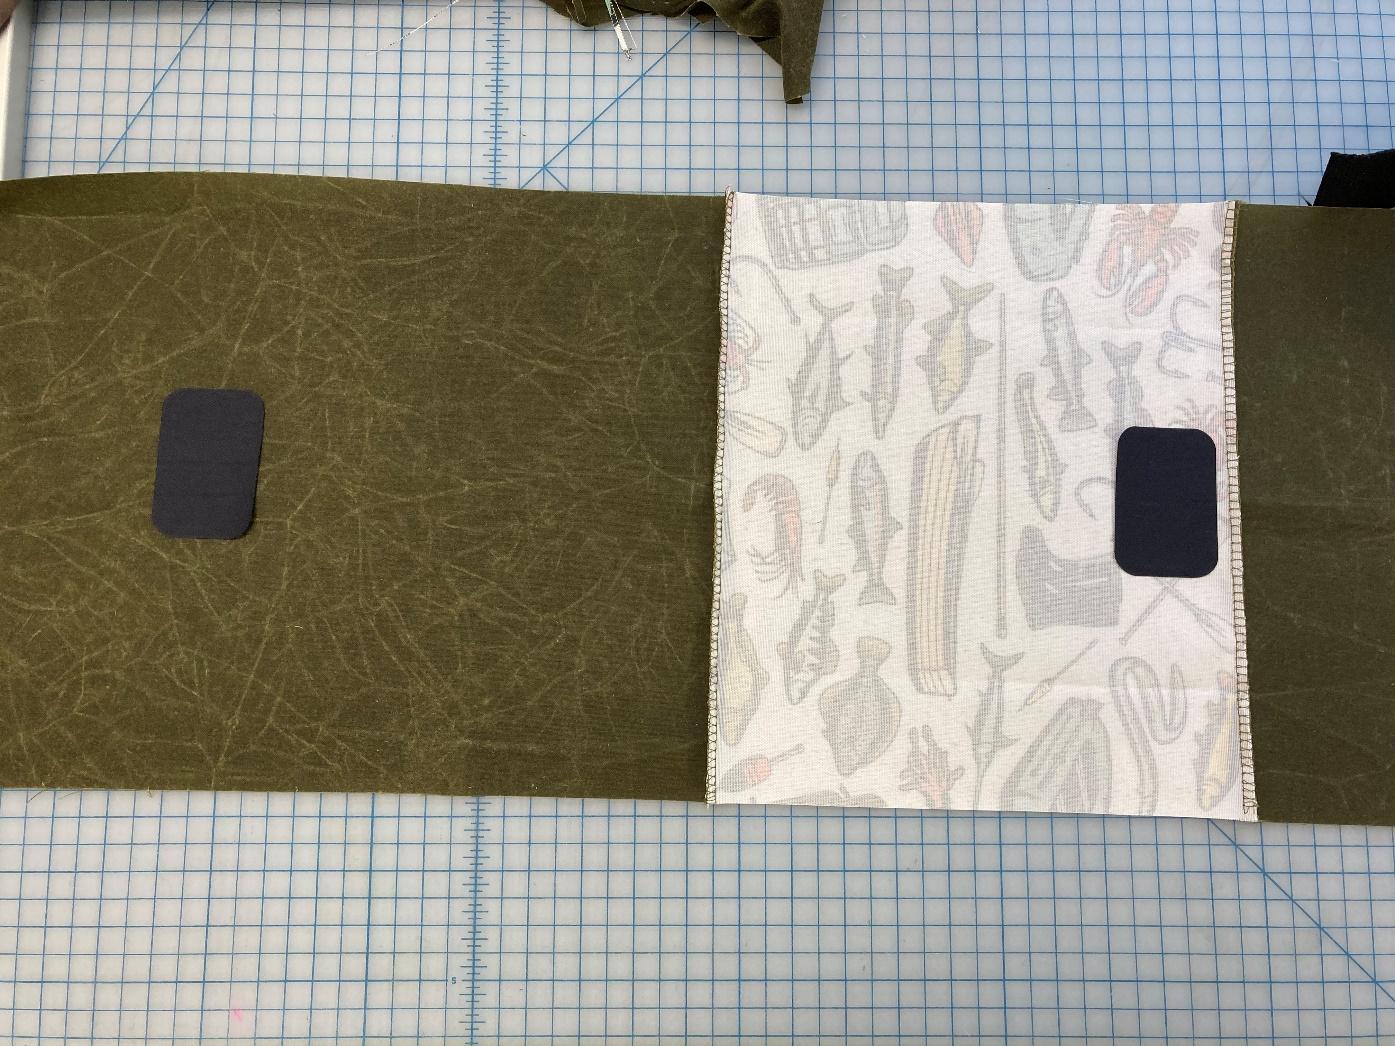
Using a chalk pen, mark indications on the strap, 2 ½” down from the top and bottom edges.

Fold the strap under a ½” at each end, sew the strap onto the right side of the bag at the 6 ½” & 24” markings you made.

To securely hold the strap to the bag, stitch on top of the strap around all 4 sides creating a box. Stitching close to the outer edges. Inside the stitched box, mark an X from corner to corner. Then stitch on top of the X markings you made. Repeat this for each end of the strap.


Trim the excess fabric around twill patches close to stitching but be careful not to cut bag’s fabric.

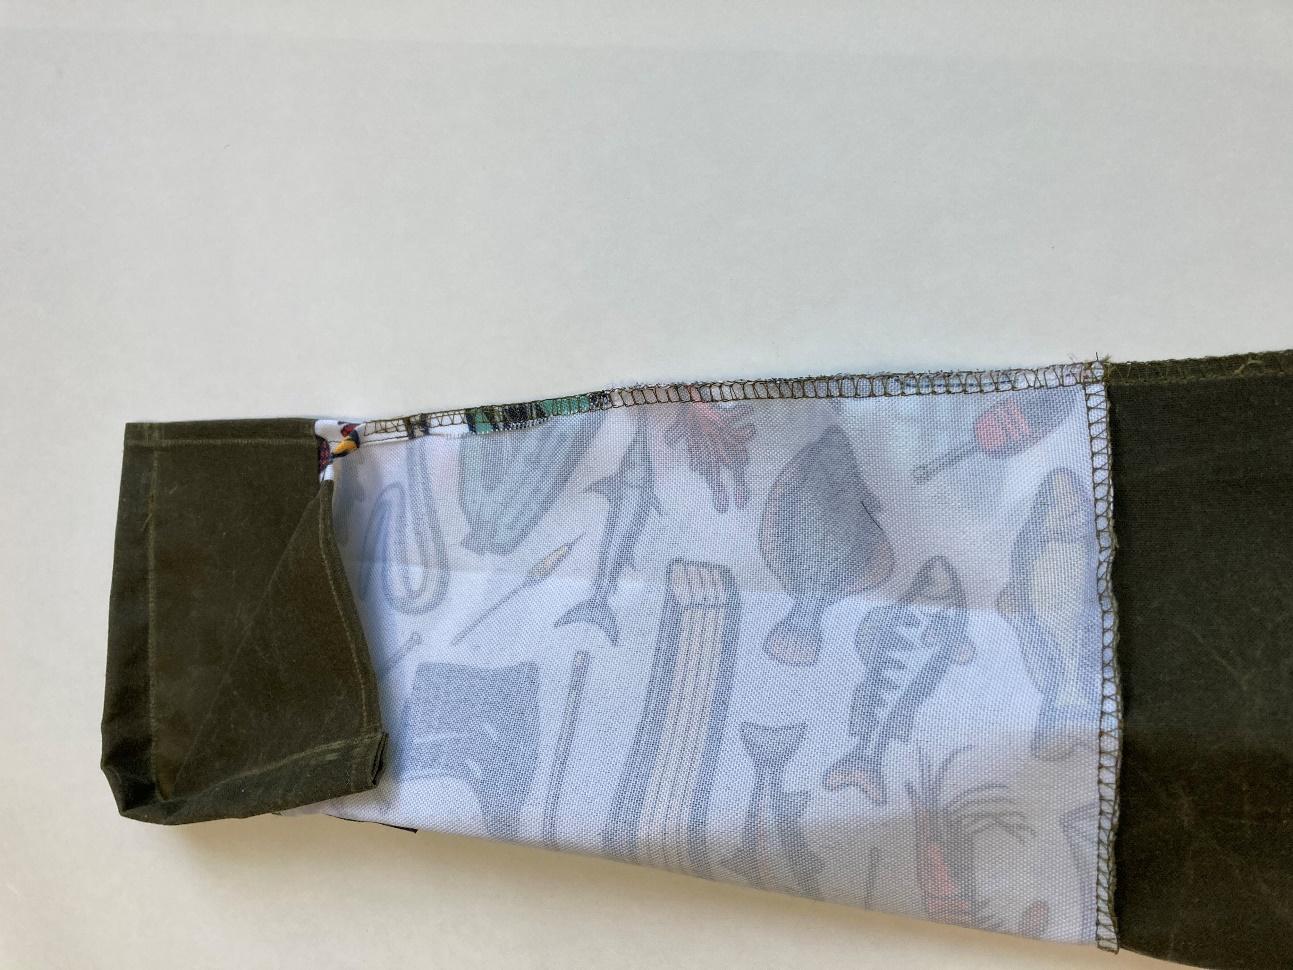
For neat inside seams, serge or fold the raw edges ¼” under twice. Using mini clips to hold folded edges in place. Then sew close to the folded edge.

To create the casing for drawstring at top of the bag, fold the fabric under twice ½”. Then sew close to the folded edge, creating an opening for the cording to pass through.

Place right sides of the bag together, hold edges secure using mini clips, and tucking the strap inside the bag out of the way. Starting approximately 4 ½” from the top edge of the casing (top of bag), backstitch, then stitch (or serge) down the side seam or edge of the bag. This closes the bag and will create a long tube with a 4 ½’ opening at the top.
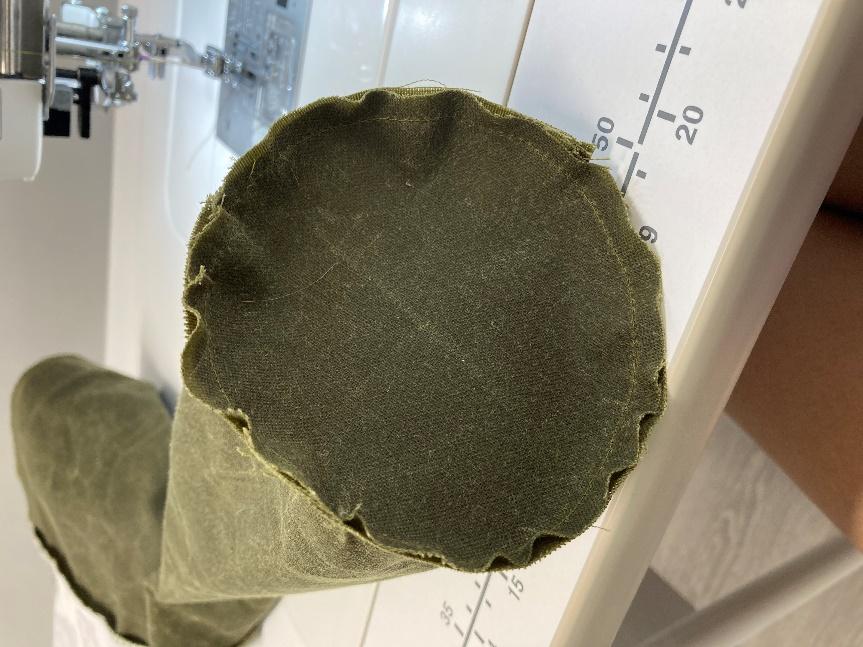
Use a compass to mark and cut a 2” diameter circle from a leftover piece of waxed canvas. Fold the circle in quarters and mark to create temporary alignment markings.

Starting at the seam on the bag, mark 4 (90 degrees) cross indications around inside bottom edge of the tube. Using the 4 cross markings on the cut circle to align with the markings on the inside bottom of the tube. Use mini clips and attach the cut circle to the tube aligning bottom edges evenly. Using HP Foot and HP plate (or your preferred sewing foot) to sew ¼” around inside bottom edge.

Part 4 – Finishing the Bag
Turn the bag right sides out.
Using a safety pin attached to one end of the cording, work the cord through the casing. Add a cord lock and tie a secure knot at the end. Add a dab of glue to the cord ends to keep them from unraveling.


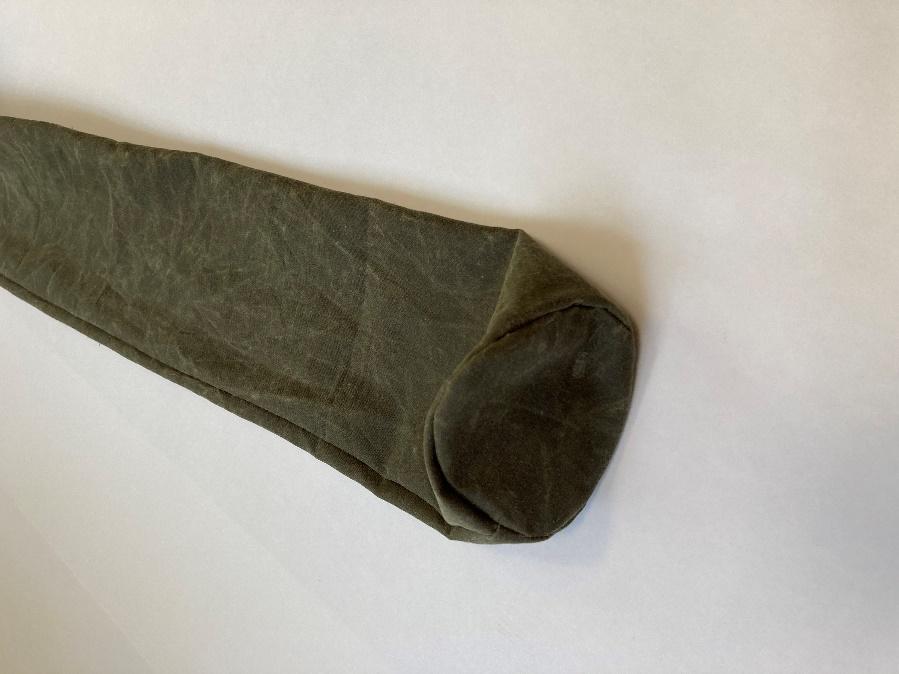
Now this fishing pole carrying bag is ready to go on Dad’s next fishing trip!
Happy Sewing and Happy Father’s Day!
Heidi
www.heidi@heidiproffetty.com